News

How to Fix Condensation & Moisture Inside Car Tail Lights

2026-10-29 0 Leave me a message

Moisture inside a tail light is one of the most common complaints body shops and parts distributors hear, and one of the most frequently misdiagnosed. A light haze that clears by mid-morning is usually normal condensation. Water beading on the inside of the lens, or a pool sitting at the bottom of the housing, means the seal has failed.

This guide explains how to tell the two apart, why moisture gets in, how to remove it, and — importantly — when repairing a housing costs more than replacing it.

Condensation or water ingress? The difference matters

Tail light housings are not hermetically sealed. Most are built with small vents that let air move in and out as the lamp heats up during use and cools afterwards. That design allows humidity to enter and leave, which is why a certain amount of condensation is expected behaviour rather than a defect.

Symptom

Likely cause

What to do

Thin haze across the lens, clears within a day

Normal condensation from temperature change

Monitor. No action needed

Fine droplets that disappear after driving

Minor humidity; vents may be partly blocked

Check the vents

Water pooling at the bottom of the housing

Seal failure or a crack

Repair or replace

Droplets that persist in dry weather

Genuine leak

Find and seal the entry point

Water plus a flaking or darkened reflector

Long-term ingress damage

Replace the housing

Getting this distinction right matters commercially as well as technically. A meaningful share of tail lights returned as "faulty" are simply showing normal condensation.

Common reasons moisture gets in

· Perished housing seal — the gasket between lens and housing hardens and shrinks with age and heat cycling.

· Cracked lens or seam — a stone chip or minor impact can open a hairline crack that admits water.

· Blocked vents — if the breather holes fill with dirt or old sealant, humidity has no way to escape.

· Failed bulb socket seal — on lamps with removable bulb holders, the socket O-ring is a frequent entry point.

· Over-tightened mounting bolts — uneven or excessive torque can distort the housing and open the seam.

· A previous bulb change — a housing that wasn't reseated correctly afterwards is a common cause.

Before you start

You'll need a socket set or screwdriver, compressed air or a hairdryer on a cool setting, silica gel sachets, a clean microfibre cloth, isopropyl alcohol, and butyl rubber sealant or neutral-cure silicone.

Two precautions worth taking. Disconnect the battery or pull the relevant fuse before removing the housing. And avoid high heat — polycarbonate lenses soften and discolour, so a heat gun on full setting will do more damage than the water did.

If the vehicle is still under warranty, speak to the dealer first. Opening the housing yourself can affect a claim.

How to remove moisture from a tail light

Step 1 — Confirm it is actually water. Dry the outside of the lens, run the engine with the lights on for ten to fifteen minutes, and watch whether the haze clears. If it does, leave it alone.

Step 2 — Find the entry point. Remove the housing — usually two or three fasteners, sometimes accessed from behind the boot trim. Look for cracks, a lifted seam, a perished gasket or blocked vents.

Step 3 — Drain and dry. Tip the housing so any pooled water runs out through the bulb apertures. Move air through it with low-pressure compressed air or a hairdryer on cool until the inside is dry.

Step 4 — Clear the vents. Check the breather holes are open. A blocked vent traps humidity inside the housing. Clear it gently rather than enlarging it.

Step 5 — Reseal the seam. Clean the joint with isopropyl alcohol, then apply butyl rubber sealant along it. Butyl stays flexible and can be reopened later for service. Silicone bonds permanently and is difficult to remove afterwards; if you do use it, choose a neutral-cure product, as some acetoxy-cure silicones can corrode metal contacts and reflector coatings.

Step 6 — Replace the socket seal. Fit a new O-ring or gasket on removable bulb holders. These cost very little and are a frequent cause of repeat problems.

Step 7 — Refit and test. Tighten the fasteners evenly rather than hard. Spray the surrounding area with water from a hose — not a pressure washer — and check again after an hour.

Silica gel sachets placed inside the housing will absorb residual humidity. Rice is widely recommended online but is considerably less effective and leaves dust behind.

When replacement is the better option

Repair makes sense while the housing and reflector are still sound. It usually doesn't when:

· The reflector has started to flake or darken. Corrosion on the reflector surface reduces light output and cannot be reversed.

· The lens has a crack running through it.

· The housing is distorted, so the seal can no longer sit flat.

· The lamp has already been opened and resealed several times.

At that point the labour spent chasing a seal is worth more than a replacement assembly. For a workshop, fitting a new housing is generally the more economical call.

Preventing it from coming back

Check lamp seals during routine service intervals. Avoid directing a pressure washer at lamp seams. Keep vents clear. Reseal properly after any bulb change. Store spare housings flat, in a dry place, away from direct sunlight.

Frequently asked questions

Is condensation in a tail light normal? A thin haze that appears in cold or damp conditions and clears on its own is normal. Standing water, or droplets that persist in dry weather, indicates a seal has failed and should be looked at.

Will moisture inside a tail light fail a vehicle inspection? Requirements vary by country and state. Light condensation is generally not a failure item. Standing water that obscures the lamp or reduces its output can be. Check the inspection rules that apply in your area.

Can I drill a small drain hole in the housing? It is sometimes suggested, but it is not recommended. It changes how air moves through the housing, can draw in more dirt and humidity, and is difficult to reverse.

How long does a housing take to dry out? A few hours with air moving through it is typical. If moisture returns within days of drying, the entry point has not been found.

Do both sides need replacing? No. Condensation and leaks are almost always a single-housing problem, unless both lamps have taken the same impact.

Need a replacement housing?

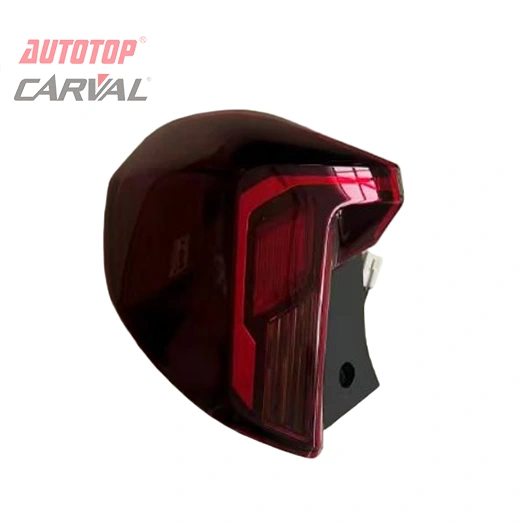
If the reflector has already started to corrode, or the lens is cracked, a replacement assembly is usually the more practical answer.

Changzhou Jiahong Auto Parts Factory supplies tail light, headlight and fog lamp assemblies for Hyundai, Kia, Daewoo and Chevrolet vehicles. Send the model year, chassis code or OE number and we will confirm which assemblies are in production, along with finish options and lead time.


Related News
Leave me a message
 
X
We use cookies to offer you a better browsing experience, analyze site traffic and personalize content. By using this site, you agree to our use of cookies. Privacy Policy
RejectAccept